Project Baja Foz!

Hey everyone, this is the new build for The Wandering Foz, continuing where the old thread left off: The Great Alaskan Tundra Humper

IMG_3756 by jeremiah stewart, on Flickr
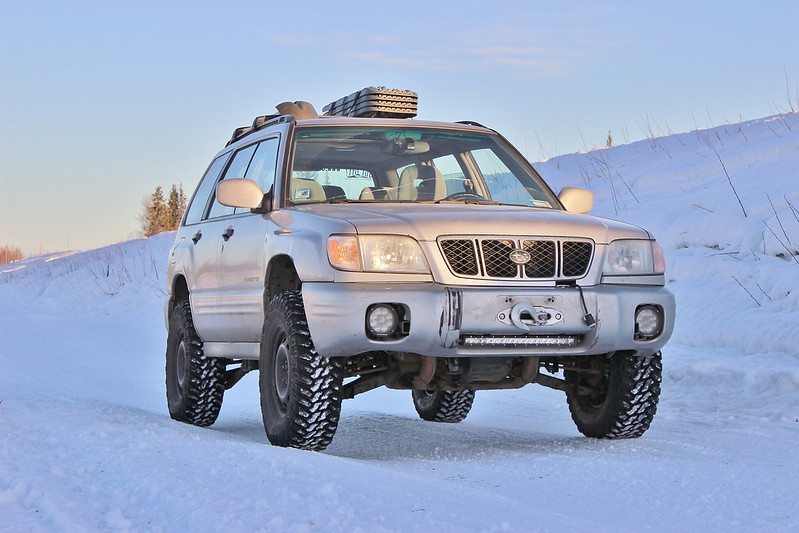
Goal:
I have wanted to race the Baja 1000 since I was a little kid, but a few years ago I came across the Mexican 1000 which is a little more grassroots and easier for a normal guy like me to race in. So that's the goal! I wanted to race in their "Rally Raid AWD" class using my Hotbits coilovers as they were at the max travel for that class, but most years there is nobody in that class. Might as well try to be competitive if i'm entering a race right? So the class I'm shooting for is Score Class 7 or BITD 7200. In the Mexican 1k it'll either be "Heavy Metal Class" or "Pre-run Truck".

For now I will only be focusing on suspension so I can stay on track to be able to take the foz on a roadtrip planned for May 2017. A roll cage and a bunch of safety items will need to be built after the roadtrip unless I have the time to do the rollcage this winter. Shooting to make the race in the spring of 2018, but if the foz is ready sooner than then, then I will enter a domestic race to get my feet wet.

Plan:
  • Dual A-arm front suspension cycling 18-22" of travel
  • Dual A-arm rear suspension with toe link (will make sense later - similar to the PPI 015 Toyota) cycling 20-24" of travel
  • 32" tires on factory offset wheels to allow for longer arms and more travel while keeping it under the BITD max width of 85"
  • Either King or Fox internal bypass coilovers all around
  • High compression EG33 unless the length is more than I want to build around, then it'll be an EZ30
  • Extended length axles (+8") probably from DSS

Follow on Instagram:@thewanderingfoz
 
Love this build!

Maybe you have seen this link allready, it's a nice story about a couple who raced an subaru outback in the Baja. Your build is much more radical but still nice to read.

I have read that! And found some other things they wrote about the Cortez rally. Very cool to see what they did with that pretty stock Outback. Though they did skip a few stages in the Mexican 1000 due to roughness, but it was understandable.

I think that its just another booooring Forester build :biggrin:

Na, its just insane :lildevil:

Did you get the 930cv flanges from Subarugears ?

Hahaha, Yeah those flanges are from Subarugears. They are beefy! And seem to have very good quality.

Update: Didn't do much this weekend because we finally had some above 0 degree temps, but i got my 930cv flanges from Subarugears in Australia for the front diff:

DSC01351 by jeremiah stewart, on Flickr

Also got a brake booster delete master cylinder kit with bias adjuster from ChaseBays which will give just barely enough room to fit the drivers side coilover right in front of it. It also allows me to easily delete the abs module and it's trillion lines:

DSC01363 by jeremiah stewart, on Flickr

Then I added some tubing to the subframe to connect the upper mount tube to the lower and dropped the whole thing from the car to tidy up the transmission mount and fully weld it. It sure looks cool as one whole unit:

DSC01467 by jeremiah stewart, on Flickr

DSC01469 by jeremiah stewart, on Flickr

Just waiting on some parts, and waiting to order some parts to get started on the rear. I'll probably just add a few tube gussets to the subframe to add some triangulation and brace the engine crossmember to the lower DOM and call it good until I get the coilovers to mount. I was going to order those 2.5" Fox IBP coilovers but it's looking like the wait time is 8-10 weeks which is pretty much when I'm hoping to embark lol. I may just get the normal coilovers with dsc adjusters since those are normal stocking items.
 
As you wrote above, the 930cv's don't have enough plunge except the RCV's...and maybe not enough for the front because you keep the oem outer cv's for better steering angles, right ? At the rear, will you use inner and outer 930cv's to add some plunge ? And what about some 2 piece axles (Heri style) for the front but made out of quality steel ? That would allow you the inner 930cv's and oem outer cv's with maximum wheel travel. Just my 2 cts !
 
As you wrote above, the 930cv's don't have enough plunge except the RCV's

It's all good, I got the plunge down to .875" and the 930cv I'm getting allows 1.18" (CVO makes an equivalent cv to that RCV one).
The rear is going to be fine as long as I put the diff in the right spot, so the axles are angled rearward at mid travel and angled straight down at droop and compression.
Price per axle would've been at least $1000 more if I went with a telescopic axle bar, and RCV appears to have stopped making their heri style utv axles, that's probably why.
 
Hmmmmm, interesting !

Instead of buying 2 new Heri's, I might change to Subaflanges and CVO 930cvs...do you think that I can keep the oem axle bars (splines and length) ? Angle should be ok...

Is there any male flange for the rear r160 differential to do the same ?
 
Looked at my '97 SF MT axles today.

Rear are 775-820mm length, 45 mm plunge and can take an angle of 25° at extended length.

Front are 685-730mm length, 45mm plunge and can take an angle of 28° at extended length.

Compared with '96 Legacy AT, front have same length but angle is limited to 25° at extended length.

Not sure the 930cv's would have enough plunge though(1,18"/30mm)
 
Hard to say whether they'd have enough plunge. DSS and CVO oem style inners only allow .75" of plunge. It's only the true subaru and the cheap aftermarket inner joints that allow more than that. I think that if you were to get Group N engine mounts, then you wouldn't need that 45mm of plunge. You should pull and axle out and measure from the diff stub to the wheel bearing face at full droop and full compression to see how much you actually need. Also, I think that you'd be just fine running a quality oem style axle, because they allow enough flex and plunge, and are definitely strong enough for the 4 bangers. I think the problem people always have are because they run cheap axles or high mileage axles.

To answer your earlier question, Subarugears doesn't make a 930 flange for the rear, I can't find anyone who does. Subarugears does make that 100mm Kombi flange though.

Little random update: I picked up some Team Dynamics Pro Rally 15x7 et40 wheels which will be perfect with the tires I have pretty much decided on for the roadtrip which are General Grabber x3's in 33x10.5r15. But if i'm out of money in two months then i'll just run my little 30's on them.

DSC01500 by jeremiah stewart, on Flickr
 
The wheels are a tight fit. Got about 1/4" of clearance to the upper uniball mount. I can just grind some more clearance into it if need be:

DSC01508 by jeremiah stewart, on Flickr

Added tube couplers to the rear tranny mount cross bar:

DSC01510 by jeremiah stewart, on Flickr

DSC01512 by jeremiah stewart, on Flickr

Then with the help of a friend, we lifted the H6 into its new home to check clearances:

DSC01518 by jeremiah stewart, on Flickr

Pretty close around the timing belt covers, but valve cover room is great, getting to the spark plugs is going to be super easy on this compared to my Impreza:

DSC01519 by jeremiah stewart, on Flickr

Oil pan clearance is tight:

DSC01520 by jeremiah stewart, on Flickr

Lastly, the factory headers will not fit pointing backwards. Pointing forwards they could fit, but they'd be super tight. Going to have to make some shorty headers.
 
Lifted the subframe up with the engine and transmission to test fit

DSC01539 by jeremiah stewart, on Flickr

You can see I had to cut out the lower rad support crossmember to fit the engine since it sits 5" lower than factory and the H6 is so long. I wont be putting anything back in there, I'll just reinforce the tow hook mounts. The subframe alone adds more than enough strength to that section.

The engine looks small from above:

DSC01540 by jeremiah stewart, on Flickr

Added some 1" DOM to the engine crossmember to make the whole thing kind of a big X:

DSC01609 by jeremiah stewart, on Flickr

Cut out both fender wells:

DSC01608 by jeremiah stewart, on Flickr

I'll probably close them up a little once I know where the coilovers are gonna sit.
Lastly, I also started working on the wire harness merge, I got the SVX harness stripped down to just the engine harness which can now be merged to the forester harness. This will be my 3rd harness job; hopefully 3rd times the charm and I wont have any gremlins!

Side note, I ordered Fox 2.5 IBP piggy back coilovers with DSC adjusters a while back and they said they should be done by the end of the month. I also ordered the radiator and fan setup which should be here this week. For the rear, I've figured out my plan and made some hub mounts on cad to get cut out by ADF, then I can start on the rear trailing arms. I think the rear is going to go pretty fast because the subframe is only going to be a few pieces of tubing.
 
This weekend I got the EG engine harness merged to the Forester harness. I feel pretty confident about this merge, I don't think i'll have any of the issues I had with my swapped Impreza. I also labeled every wire I merged with heat shrink labels just in case I have to go back in there for diagnosis:

DSC01614 by jeremiah stewart, on Flickr

DSC01613 by jeremiah stewart, on Flickr

Then I put the harness back in the car, followed by the heater core and dash board:

DSC01617 by jeremiah stewart, on Flickr

Also got my Mishimoto radiator and fan setup. Looks like i'll have to do some more cutting up front to fit everything.

DSC01616 by jeremiah stewart, on Flickr

DSC01615 by jeremiah stewart, on Flickr

I'll be installing the engine and transmission and the subframe for the final time this week since I welded the whole thing up last week. I'll have to add the shock mounts to it later, but that'll be easily done in the car. I'm just waiting for the coilovers and the mounts to be cut out still.
 
Good work.

I bet you're excellent at assembling Christmas lights! :iconwink:
 
Some excellent work, esp on that wiring loom! What ECU are you going to run?

What are you going to do with the oil sump clearance? That might wear a hole if you get mud/stones in there
 
Good work.

I bet you're excellent at assembling Christmas lights! :iconwink:

:lol: You bet!

Some excellent work, esp on that wiring loom! What ECU are you going to run?

What are you going to do with the oil sump clearance? That might wear a hole if you get mud/stones in there

Thank you! It'll be running the stock ecu but with a custom chip in it from a guy named Jake. It allows for custom tunes to be burned to it, and he's sending it with his latest tune on it. I had his old version with the high comp eg in the Impreza and it was a great improvement over stock.

UPDATE:
This weekend wasn't full of much work as usual, but I did some under dash assembly as well as mounted the radiator. The goal was to retain AC of course, but as you will see, there is no way to fit the condenser in front of the radiator. Also I was really trying to get the radiator further up and back, but there is just not enough room. My approach angle is just getting worse and worse. The further along I get, the more I think a turbo 4 banger should be in there.

DSC01654 by jeremiah stewart, on Flickr

DSC01655 by jeremiah stewart, on Flickr

After a lot of cutting, the grill fits (also yes, I removed the yellow vinyl from the headlights):

DSC01656 by jeremiah stewart, on Flickr

DSC01657 by jeremiah stewart, on Flickr

The radiator cap is here and is low enough to not interfere with the hood:

DSC01659 by jeremiah stewart, on Flickr

I realized later that i forgot to pull that piece of wood out that I was using to hold the radiator up, now it's stuck LOL. I'll have to cut it in half to get it out:

DSC01660 by jeremiah stewart, on Flickr

Also started cutting some tire clearance into the fender supports:

DSC01662 by jeremiah stewart, on Flickr

This will -in theory- give me enough room to have about 3" of ride height at bump with 35" tires... If I can fit 35's.

DSC01661 by jeremiah stewart, on Flickr

Oh and here's the radiator fan clearance:

DSC01663 by jeremiah stewart, on Flickr

That's it for now.
 
Nice work! I hope I can see this thing this summer. If you want to do some desert shake down runs, I know of a few places as well as know a few guys who would love to run with you side by side. Subiworks is just down the road from my house and those guys love hauling donkey in their long travel Fozzys lol.
 
Update: Lately I've been doing small but time consuming stuff like installing these Aerocatch Extreme latches:

DSC01923 by jeremiah stewart, on Flickr

Supposedly the Extreme version has more beef internally than the standard Aerocatches.

DSC01924 by jeremiah stewart, on Flickr

Here is what the front brake setup is gonna be:

DSC01926 by jeremiah stewart, on Flickr

Those are 06 WRX 4 piston calipers which are the largest ones I can fit under these wheels. The rear will have the factory 2 piston calipers that were on the front of the forester, using standard front disks. Here is the fitment of the 4 pots with the wheel:

DSC01925 by jeremiah stewart, on Flickr

Notice that those short lug nuts barely use all of the threads on the factory studs, so those will get swapped out to 3" ARP studs like I just put on the rear hubs:

DSC01927 by jeremiah stewart, on Flickr

Proper lug nuts for those wheels are in the mail along with my rear coilovers and other fun stuff. Still no front coilovers yet, Fox keeps pushing the date back.
I was also going to get the rear trailing arms all tacked together today, but I was given the wrong size dom yesterday and didn't realize it until today.
 
Needed to take a break from homework today, so I finished up my center dash. The heater controls used to be above the Nexus 7, but I wanted the tablet to be easier to see and touch so I swapped them around and moved the tablet closer to the face of the bezel:

DSC01929 by jeremiah stewart, on Flickr

Just a nice little project with instant gratification. Also, I guess I'll explain what I do to make the tablet to make it work perfectly as a head unit. First, I have the charger wired to key on power, not constant 12v. Then, using the app Trigger, I set the tablet to turn on, set screen timeout to never, open Spotify, press play, and connect to wifi. Then, when 12v is turned off, it pauses, sets screen timeout to 15sec, and goes into power save mode.
This allows music to download off of home wifi when the car is warming up. Also, I can use the app Torque to get obd2 data from a bluetooth dongle - but this engine is obd1 so that doesn't matter.
The headphone jack on it goes straight to a small amp that runs the door speakers, and tee's off to a larger amp for the sub. So all of the volume control is done on the device which can be a hassle, so I downloaded an app that leaves volume control buttons in the notifications panel.
 
I have wanted to race the Baja 1000 since I was a little kid, but a few years ago I came across the Mexican 1000 which is a little more grassroots and easier for a normal guy like me to race in. So that's the goal!

Very cool, Jeremiah! :cool:

I'm not on here too much anymore...but I'm grabbin' a big 'ol box of popcorn for this one!!! :cool:

Like Carl, I don't visit ORS much anymore these days. But your 1000 mile Mexican journey isn't planned until 2018. So there's still time to get on board and follow along. ;)

Good luck! :)
 
Back
Top