Venoms lifted H6 Gen2 Lib

Hey guys,

Thought i might share the details of my car around on here ;) I bought this in March. Flew up to Al's from AMAutos place in QLD and drove it back to Victoria with my girlfriend co-driving. This was Als personal car which he converted to a EZ30D. Pit-stop at Bennies to show off on the way back of course. I had a month wait to get into the engineers, which was worth it. Only changes required were a padded steering wheel and a quieter muffler, easy :D I had to change to stock shocks and springs for the RWC which i wasn't happy about because they were engineered.

Current specs are:
2003 Outback H6
V3 STI gearbox
4.44 ratio diffs
Front LSD, clutch pack Rear LSD on my desk
277mm WRX front brakes

Fuel use has so far averaged 9.53L/100km over 5 tanks of fuel. It is very efficient on the highway and around town if driven appropriately.

Plan is to build this into an off-roader.

H6Gen2007.jpg


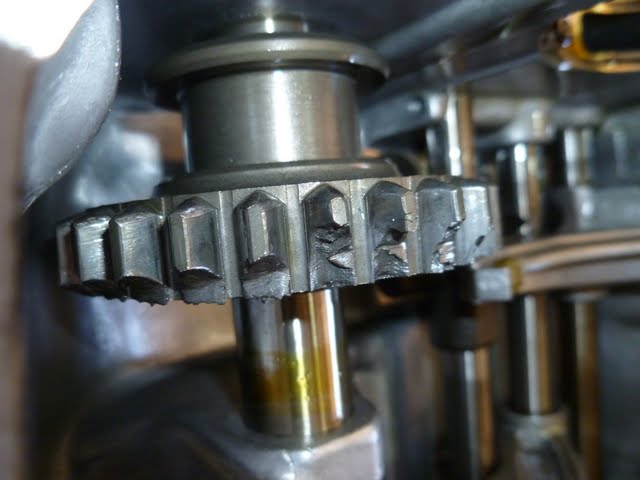
These are Als pics from the sale and his posts on the conversion process.

H6Gen2001.jpg


H6Gen2002.jpg
 
Last edited:
I like the front grill, the back not as much…well, my 2 cents anyway :iconwink:
 
Had an exciting moment today. Came across this on the internet by coincidence while looking up part numbers for my valve cover gaskets. It's a clutch sleeve kit: https://www.neimportedparts.com/index.php
Worn or grooved gearbox "quil" (what the throw out bearing slides on) may be the answer to a number of issues my car has had since this g'box went in. Throw out bearing noise from the moment I put in this gearbox, years ago. Noise goes when pushing clutch in. Opposite to a failed throw out bearing, which was brand new when installed. T/O bearing replaced again with DCCD install with no improvement. Shudder on clutch engagement, sometimes. Engagement point on the pedal constantly moving. Jerking on acceleration on/off or changing gears. Creaking on clutch pedal movement, despite lubing the pivot point (and pedal) and a brand new cable.

In prep to solve this issue when I do the motor change I have a complete clutch fork replacement kit and clutch waiting to go in with the new motor. Installed those mustache bar lock bushes. **** if all that didn't fix it I had prepared to move on to a different car because it really effects drive ability.

Never heard of this problem before, ever, and it is apparently common on all 5MTs? Anyway I'm buying it and a big fingers crossed the quil is the problem and this sleeve the fix.

Probably exacerbated by a lack of inspection plate and the housing area been full of dirt, mud and sand on numerous occasions over the years.

For fun i'll link a vid of this kit been installed: https://youtu.be/frcvMyAyOco\
 
Last edited:
^ Sounds good, Venom ... :ebiggrin:. Hope it fixes your problem.

It also makes logical sense.

I always thought that this shaft was called the main input shaft, or sometimes just the pilot shaft (as it goes into the pilot bearing in the flywheel side). So I too have learned something new today.

Could it be that the spelling should be "quill"? Just a thought.

See the Wikipedia article here.
 
The plot thickens...

RT that is the input shaft. The thrust bearing slides on a sleeve around the input shaft which is called the snout or quill. Bennie made a good point on Ausubaru, the D/R g'box already has a bolt on steel sleeve as you can see in my pic. That thrust bearing sleeve is to fix the aluminum quill on the single range gearbox which is part of the casing.

Can just see the bolt heads for the steel quill of the D/R box.
20120918_121146.jpg


And the single range
PDMLogo2.gif


Different, but the symptoms suggest mine is still worn. The fact it's steel probably explains its longevity despite the problem. Will get a new bolt on quill for when I do the clutch though, it's been through a lot regardless :iconwink:
 
^ As you say, very interesting indeed.
Good that the nose of the input shaft housing can be repaired. Got to be far cheaper and easier than a new housing, and all that this would entail stripping and re-building the entire box - and all the pain of ensuring that thrust washer clearances were correct, 'cos they sure as hell would be different in a new housing!

I must say that the inside of your bell housing looks every bit as bad as your previous description led me to think it might be.

Let's face it, these cars were never designed to put up with that sort of **** in there. Even the bell housing of my '68 LC didn't have all that crap inside it when I replaced the clutch plate with a 'velvet touch' fork lift clutch plate. And it had been up to my ankles under water ... Up to my ankles while driving the vehicle, that is ... :puke: :lildevil:.
 
While I intend to read back through the entirety of this thread, I'll chime in here as I have a little experience with the quill and sleeve.

The reverse gear in my 95 lagacy (USDM) "cracked the sad" years ago, forcing me into the opportunity to test a theory about gearing, namely going from 3.90 to 4.11. That gearing compensation made up the difference in my oversized tires better than I thought it would and so I finally had the joy of regained power lost to undergearing (and then further fueled the fire for my DR 5MT hunt :)

At any rate, I swapped in a USDM 99 OB 5MT, from a 'limited' model which had this steel quill sleeve on it (and there was a ittle tag in the engine bay indicating some modification had been made. I didn't pay any attention to it b/c I knew nothing of this stuff at the time). It was a bit of a "to-do" because I'd just done a clutch kit about 2 years before so I wasn't too interested in another one, and I was stiil dreaming but not quite at the reality stage of my AUDM DR 5MT. :)

And here's where the story becomes relevant.


So I had a known, newish TO bearing from my clutch kit, vs. the unknown one with the transmission. BUT the sleeved quill is a different size from stock and therefore requires a differet/oversized TO bearing. And through a bunch of searching, I was unable to find JUST an oversized TO bearing to go onto a sleeved quill, so I just went with and reused the unknown TO bearing that came on the transmission. In this research, I did find out (from exedy) that the -010 Part Number clutch kit spec'd for my 95 legacy is really, for all intent and purposes, the same part as the -004 PN spec'd for my wife's 03 OBS, yet about (I forget exactly now) $40-60 cheaper (the -010 is less than the -004) FOR ESSENTIALLY THE SAME THING, and the clutch kit spec'd for a 99 OB with the oversized TO bearing was even more still (I think around a hundred dollars or so more). So, while the steel sleeved quill repair can save the case housing (a BIIG help), it does add bit of cost in the clutch replacement step...

broken Reverse:
P1030596.JPG


95 5MT left (3.90 final) 99 OBL right (4.11 final) with sleeved quill
P1020659.JPG


95 5MT right (3.90 final) 99 OBL left (4.11 final) with sleeved quill
P1020663.JPG


99 OB transmission code
P1080400.JPG


sleeved quill with oversized TO bearing
P1020632.JPG


(I remember taking a macro, close-up pic of the sleeve but I can't seem to find it just now. . . . when/if I do, I'll add it here)

I imagine though that eventually, with enough searching, one should be able to find JUST and oversize TO bearing without having to buy the whole clutch kit. . .


Aain, this is all from (as mentioned here) single range transmissions, and I had no idea the DR one was a steel quill (or maybe i did notice that, but probably not). so there's yet another plus for the awesomeness of AUDM stuffs!!! :)
 
Last edited:
Yeah if you have a sleeve kit you need to source a matching TO bearing. Not too sure if the various available kits use the same or interchangeable TO bearing, that would be something to check out.

Swapping IACV did nothing to fix a P1507 code which has been seriously hindering my car for a few weeks now. It sends the car into limp mode, very ****ing annoying. So taking a punt it was O2 sensor related I took a blow torch to the O2 sensors to clean them up. Also replaced the nuetral switch in the tranny, reportedly a common culprit for the p1507 code. P1507 code gone.

Next popped up P0500 (vehicle speed sensor), which made sense because my speedo crapped out about a week ago. It was actually loose in the tranny which probably hastened the demise of the speed sensor. A quick trip down to Jolly's netted me a second hand unit which I installed down the road. Speedo and Odo back! Cruise control now working again! Yay. No more codes.

Car is now running smooth. It no longer stalls when coming to a stop and a flat spot is now gone too, both problems I have had for a few years now. Can only put that down to either the neutral switch or the idle adjustment screw, as done a few IACV O2 sensor TPS MAP sensor swaps over the years to no avail. Actually think I had the issue with the old tranny too, so unlikely to be 2 bad neutral switches.
 
H6 in the Carport/Workshop
20140712_144315.jpg


Fuel rails removed, at this stage I was planning on removing the heads...
20140712_144323.jpg


Coolant outlets, look pretty immaculate to me.
20140712_144555.jpg


20140712_144603.jpg


A light varnish, nothing I'm worried about. No sludge, which is great.
20140712_151213.jpg


20140712_151227.jpg


20140713_123630.jpg


Shiny! I did want to paint these, but it was way too cold. Either lime green or a brembo gold.
20140713_123709.jpg
 
New iridium plugs anti siezed and ready to go in. Man these things are expensive.
20140713_125931.jpg


LIC half moon plugs in. Kinda sexy. Was uncertain about installing without the valve cover going on after, but I noticed the old half moons weren't seated properly and protruded into the rubber gasket potentially causing a leak. This way they are seated flush and square to the gasket surface, and i could remove the excess sealant.
20140713_133410.jpg


Took a whole. ****ing. day. to clean the covers and gasket surfaces for just the timing chain cover and valve covers. Looking at this help me decide not to touch the heads. Plus not in a particularly friendly work environment for it (sandy). Chain tension seems really good as soon as the motor turns over. I have nightmares that I missed a spot ;)
20140713_145021.jpg


Probably the narrowest spot for the fuji bond gasket. I suspect this is the source of the leak on mine. Most of the timing chain cover gasket surface has a chamfer on the inner edge, so I think it beads between that and the flat surface on the motor to seal it. There's virtually none of the mating surface itself. However no chamfer at this spot, so i filed a smallish one into the cover here to help seal it.
20140713_145033.jpg


No photo of it but I siliconed and reinstalled the timing chain cover. Just imagine a lot of three bond, like, a lot.

Valve clearances measured. Intake clearances all fall about .01 to .02mm within specs (.20mm +.04mm/-.06mm).

Exhaust are all out of spec, one by about .08mm but most .05mm too tight. Plan is to adjust the specs of all of them to get to the maximum side of factory specs, as the clearances will get smaller over time. That should give me the most life before they need to be touched.
 
Not sure, wouldn't want the gasket surfaces anodized? Can they selectively do surfaces?

I would like them coated with something, those stains look like aluminum oxidation thats stained with oil, real pain to clean. It almost needs to be polished off, hard to do in the car!
 
^ Gidday V

I am sure that there is some sort of resist available that is applied to surfaces that are not wanted to be anodised, but maybe not.

If you want to pretty it up, maybe paint the items with high temperature engine enamel?
 
That was my initial plan RB. It's not important at this stage though, it can go back together as is. The goal at this stage is a reliable motor I don't have to worry about for some time, while addressing the clutch issues since I have that opportunity. I might also get my Valiant re registered just in case this all takes a bit longer and I need transport, plus it would be nice to have her on the road.

Some shiny colours can go on the old motor when I build to to take boost.
 
I completely agree, V

A working, reliable motor is infinitely preferable to a pretty, non-functional one ... :).
 
Might as well get these done while they're off the engine. Not sure if they can selectively anodise, RB might be right. You'll have to call some anodisers & ask while you get a quote
 
Waiting on timing chain tensioners before I can go back to working on the motor. So started up a little project, a new raised floor for the rear cargo area. Plan is not much higher than stock, just flattens it out and a stronger material as the stock mdf is pretty weak. Then figured it would be a great place to hide the amplifiers which currently reside on the back of the rear seat. After playing around with amp positions I found out the speaker wires and RCA leads were too short. That's cool because I wasn't happy with how I ran those in the first place (guesstimates length, some too short and spliced). So then most of the interior came out to make it easier to run the wires. Then I decided the carpet is ****ing revolting (even after numerous steams cleans) so that was chucked. Then I found out underneath the carpet is filthy so that was washed out.

Will continue the job tomorrow once I get some cable management happening and finish the wiring up, afterwards the interior can go back together and I can get back to that false floor :)

Started with this:
20140802_162222.jpg


Pretty simple construction, no glue or nails. Tight fit and joins keeps it all in place.
IMG_20140802_162329.jpg


Glue gun, strips of MDF and plywood to make up a template.
IMG_20140803_145100.jpg


Marked out on the plywood.
IMG_20140803_145024.jpg


Cut out, not bad for a very first attempt doing this sort of thing.
IMG_20140803_145934.jpg


In place. Using minimum number of screws to hold it down.
IMG_20140803_150301.jpg
 
Seriously yuck.
IMG_20140804_142445.jpg


Running new speaker wire. Silicone spray is seriously helpful when pushing the wires through the rubber conduits thingys between the door and body.
IMG_20140804_142430.jpg


The mess to come back to tomorrow :)
IMG_20140804_150007.jpg
 
Back
Top