Peter3013
Forum Member
- Joined
- Sep 12, 2021
- Messages
- 23
- Location
- Melbourne
- Car Year
- 2015
- Car Model
- 2.0i-L
- Transmission
- 6 Speed Manual
Portable Battery to Battery Charger
First off - I am not an Auto Electrician so this info is only for entertainment purposes. Different vehicles have different electrical system constraints & considerations so these details may not be suitable for other vehicles. Consult a professional if unsure.
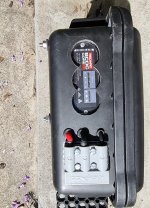
A little while back I brought an ABS Case at an end of year sale for $10. I had no idea what for at the time. Later in the year I received a Redarc Gift voucher from the kids for Fathers Day and an idea began to germinate. I had been thinking about picking up a trailer to stick all my camping gear in so the Forester didn’t turn into a sardine can every time we went camping. Here’s what I did:
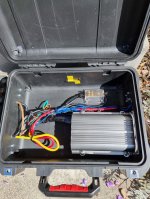
The Redarc 25 AMP Charger I selected was not suitable for installing in the Engine Bay but ok for the interior of the car or trailer.....lso it was the cheapest.
https://www.redarc.com.au/Content/Images/uploaded/Manuals/BCDC Dual Input Instruction Manual.pdf
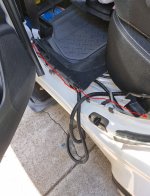
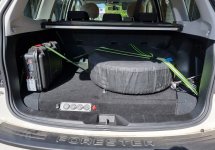
1 x Red AWG 8 (40Amp, 1-5 meters) (or could’ve used AWG 6 - Rated at 50Amp 5-9 Meters) Positive Cable ran from the Crank battery Positive Terminal to a nearby 40Amp Midi Fuse (as recommended by Redarc) then to the 3 pin Anderson plug on the Battery Charger case at the back of the Forester.
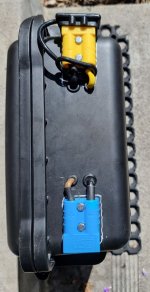
1 x Black Negative Wire ran from the negative terminal of the Crank Battery to the 3 Pin Anderson plug on the Charger box and from the Charger Negative Terminal to the Blue Anderson plug and the negative Terminal of the Battery Box.
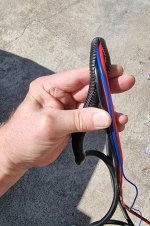
1 Blue wire AWG 16 (10Amp) ran from the under Dash fuse box via a 15Amp Fuse Tap (see my previous post “Blue wire connection to Engine Bay Fuse box” to the Battery Chargers 3 ping Anderson plug. I didn't need to use the remaining wires so I Terminated them by rolling them and wrapping in Electrical tape.
All 3 Wires connected to the BDCD via a 50Amp 3pin Anderson Plug (from Kickass). The below Wire Chart took most of the guess work out of what gauge wire to use over a certain length as well as working out the fuse size for the positive wires:
http://assets.bluesea.com/files/resources/newsletter/images/DC_wire_selection_chartlg.jpg
The output from the Battery Charger ABS Box to the 120AH AGM Accessory Battery is via a Blue 2 pin Anderson Plug connecting a Brown Positive Wire with a 40 Amp inline Fuse just before the positive terminal of the AGM Battery. Also the Charger box has a Solar Panel input via a 2 pin yellow Anderson Plug. The Redarc has its own inbuilt MPPT Solar Regulator that takes over from the Crank Battery voltage input when charging so you don't need one attached to your Solar Panel. The coloured Anderson plugs are so the connections don't get mixed up however they are more expensive for some reason so if you have some spare paint laying around the plain ones may do.
Used it over the recent Holidays and it kept the Auxiliary Battery Fully Charged when we were on the move, powering the Fridge, lights etc. Next I will see how it goes charging a battery in the Trailer...a while off yet.


