Advice on prepping second hand motor

Venom

Forum Member
Joined
Jun 8, 2009
Messages
632
So i ordered a S/H motor from Japan with 80,000km on it which I picked up yesterday. I have a complete gasket kit from Subaru, obviously won't use the whole thing but I wanted everything on hand just in case.

Would like some advice on what to inspect, replace etc etc.

Fairly sure the 80,000km will be genuine or very close considering it was cruising around a little inland with a 100 odd million people on it.

Now my current motor both burns and leaks a total of 1 litre of oil every 1,000km or so. What I want to avoid is this degeneration with my newish motor. Suspect a lack of valve adjustment (I never did it) has led to a reduction in clearance, leading to burnt out valves resulting in burning oil. Timing chain and valve cover also leaks. Low engine oil has led to increase wear of the timing chain and it has death rattle on start even when warm.

So on my to do list so far:
Valve cover gasket kit replacement, including some cool aluminum half moon gaskets.
Measure valve clearances and adjust if necessary
Remove timing chain cover and reseal
Inspect timing chain guides for excessive wear, correct clearances, etc.
New spark plugs
New thermostat (factory)

Is it worth pulling heads? What should I check to see if i need to?

Compression on all cylinders is between within 5psi.
Some oil on the spark plug threads, but doesn't seen to be too much build up on the plugs.
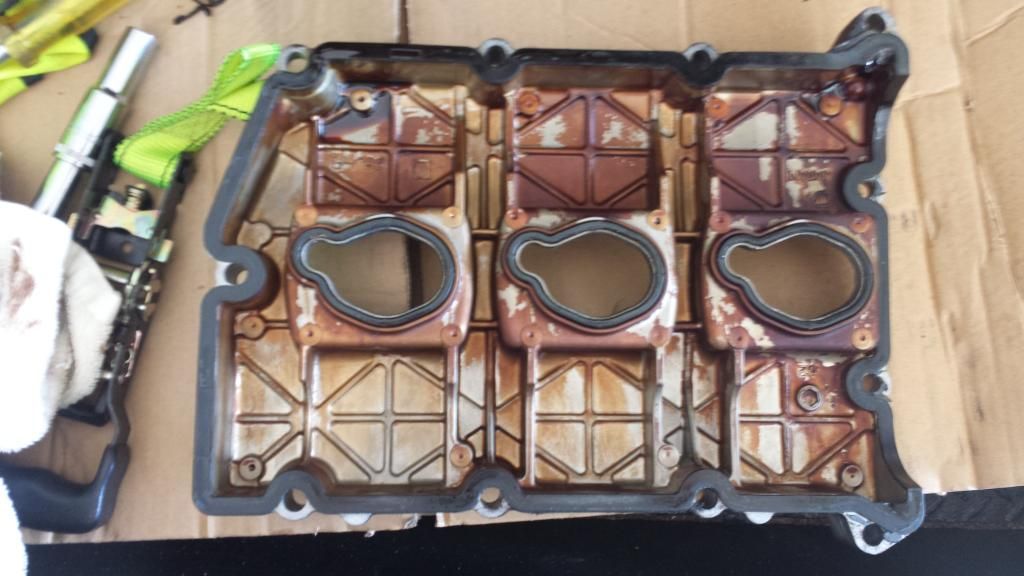
Looks like standard varnish in the valve covers. No sludge and doesn't appear to have been cleaned by the seller (easy to wipe off myself).

The whole point of getting a second hand motor was so I could prep it as much as necessary with no time constraints. However would prefer to avoid unnecessary cost and work (like pulling heads) if I don't need to.

And pictures, because it's the internetz.

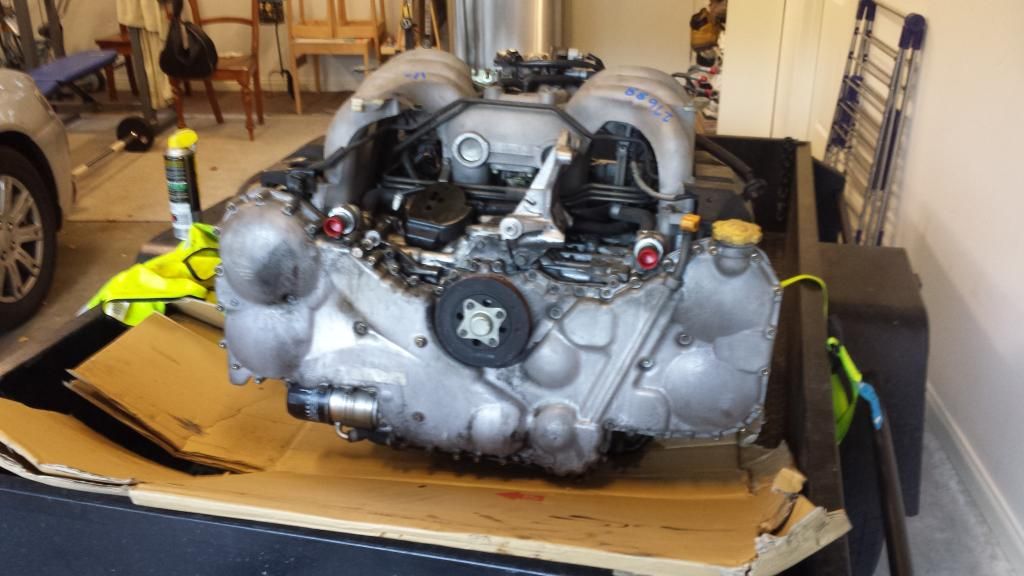
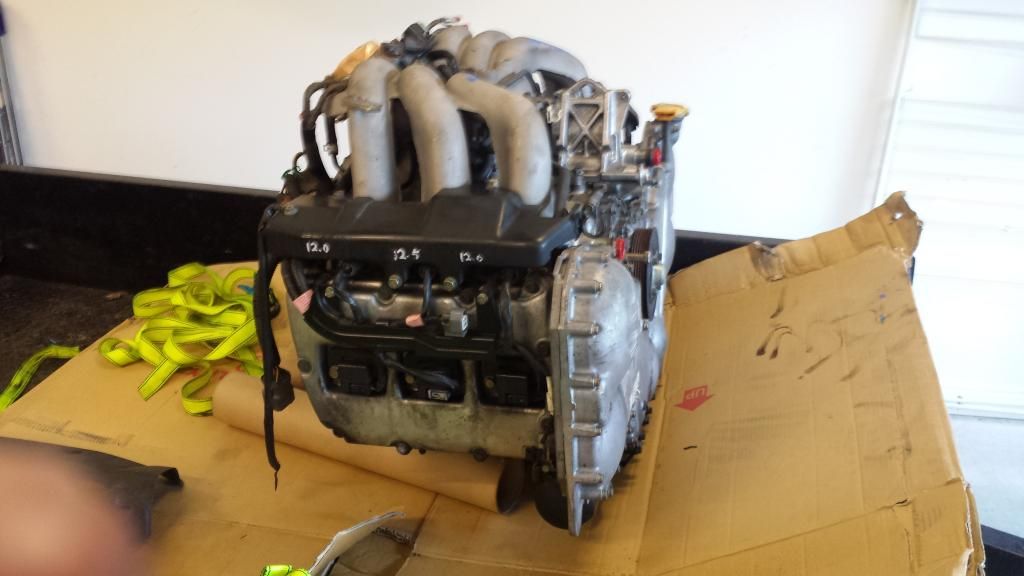
Seller has written compression test results on the fuel rail covers. They are a reputable wrecker according to Import Monster. Obviously results would be from a cold engine. I checked the sale page and read the gauge to clarify ;)
20140703_160733.jpg


Compression test results are in Mpa and should actually read 1.20 to 1.25, so 175 to 180 psi.
20140703_160745.jpg


20140703_160758.jpg


RH side
20140704_113408.jpg


20140704_113433.jpg


Small amount of oil present on all RH spark plugs.
20140704_114520.jpg
 
Last edited:
Valve clearance measurement and adjustment guide found here https://subenews.deej.net/wiki/index.php?title=EggH6:ValveAdjustmentCheck&printable=yes

Copy pasted for future reference.

From Subenews

Valve Adjustment Check Procedure

Measuring valve clearance is pretty easy. Not quite as easy is removing the necessary stuff and then the valve covers, still not too bad though.
I'll try to do this as a step-by-step procedure. It will be for an early H6 because that's what I have and have experience with.
THE ENGINE MUST BE COOL, Wait at least a couple of hours before taking any measurements.
1. Remove all of the fittings, brackets etc. that are attached to the valve covers.
2. If needed, remove the fuel rails. I made custom ones and I had to remove them. You can probably just remove the 2 mounting bolts on each rail to provide wiggle room to remove the valve covers.
3. Remove the m6 valve cover retaining bolts. I needed a 10mm wrench.
4. GENTLY pry the valve covers off of the head. The factory uses RTV in the hard to seal areas like corners and this makes removal a little challenging. It will probably take some creative maneuvering to get the covers off what with all of the motor mount and other stuff in your way. It's best to simply remove or loosen items rather than fight with them.
5. Store the covers in a safe place.
The following may not be the most time efficient way to do this, but I do it this way to avoid confusion. By the way, ALWAYS turn the engine in its normal direction of rotation.
6. Locate the front left INTAKE valve pair. They will be immediately under the intake manifold runner.
7. Rotate the engine until the cam lobes that actuate the valves are directly opposite the valve, that is, the heel of the cam, not the lobe tip, is facing the valves.
8. Using a set of feeler (thickness) gages, determine which one will slide between the camshaft and the valve adjusting shim. The thickness of the gage that will fit between them with a couple of ounces (60 grams for you metric types) of force is the valve clearance. If one gage is too tight and the next smaller one is a little too loose, close enough, pick the one that you think is the best fit. For the early H6, Subaru says the clearance for intake valves is .008" plus or minus .0016", so anything between .0066" and .0096" will be in spec. I tend to set valves on the loose side in engines that run hard (ours do). I would prefer .009 to .010".
9. Write down the measured clearance for the intake valves at that cylinder.
10. Rotate the engine until the center INTAKE cam lobes are pointing directly away from the valves. Go to step 7 and 8 and do them again. Remember to write down what you measure.
11. Rotate the engine so that the cam lobes are pointing away from the INTAKE valves and do steps 7 and 8 once more. Write it down.
 
12. Go to the other side of the engine, front, INTAKE, an do the same thing you did for the left side. Seems to be a theme of some sort here, doesn't there?
13. Now for the exhaust valves. Start at the front left again, locate the exhaust valve pair, and measure the clearance. Subaru says .0098" plus or minus .002", or .0078 to .0118". I would shoot for .011 to .012".
14. Now that you have all of the clearances recorded, locate any numbers that fall out of the desired specs. Now the fun begins, so pay attention.
15. Lets say you have an INTAKE valve with .004" clearance (You are shooting for .010").

  • You want to increase the clearance, so subtract .004 (measured clearance) from .010 (desired clearance) and you find that you need to increase clearance by .006".

  • If the measured clearance was .012", you would want to decrease clearance by .002"

  • Here's the hard part. You will need an official Subaru Shim Replacer Assembly, available at your local Subaru store, or some kind of home-made tool that will allow you to remove the shim that resides just under the cam lobe.

  • Once you have the tools you need to remove the shim, remove the shim ion question and measure it's thickness.
Lets use our .004" clearance valve as an example.

  • Let's say the shim you removed is .103" thick. You need .006" more clearance, so you need a shim .006" THINNER than the one you removed, or .097". Pretty easy, huh? Go through all of your out of range valves in this manner and write down a list of the shims you have and a list of the shims you need. With any luck, you'll find that some of the removed shims will work in places where you removed other shims. A trip back to your friendly Subaru store will complete your shim list. By now you probably know the Subaru parts guy pretty well.

  • An alternative to purchasing shims might be to have the old ones ground down by a friend with a surface grinder. It is absolutely necessary that the shim faces are parallel and have a fine finish, so don't try to rework them on a belt sander or bench grinder. Of course, grinding them only works if you need thinner shims.
16. Install the new shims into thier appropriate valve assemblies and REMEASURE THE VALVE CLEARANCE. Don't assume for a minute that you did the math right, got the shims in the right place, or did anything else right. If all is right, you're a hero and can go on to the next not so adventuresome step.
17. Clean the valve covers. Remove the gaskets carefully (they're reuseable) and clean them too. Don't use a strong solvent on the gaskets but get all of the old sealant off of them.
18. Clean the cylinder head gasket surfaces. Don't scratch them.
19. Install the gaskets into the grooves in the valve covers. Make sure they are seated fully and properly.
20. Apply a high quality RTV sealant ( Subaru recommends Threebond 1280B, don't use generic stuff near oil, it will leak) to the corners of the mating surface on the head and install the valve cover. Try not to smear the RTV while doing this; you could cause a leak.
21. The screws that hold the valve covers on are shoulder-type and meant to be to torqued to 4.6 lb-ft (6.4 N*M). They are designed to be fully tightened against the shoulder and will not allow the gasket to be over compressed.
22. Once you are happy with the cover installation, reattach all of the stuff you removed, start the engine and check for leaks, strange noises tools left inside the engine, etc.
23. If all is well, enter what you did in the log book and go fly.
24. Considering the valve clearance news of late, I plan to make either 50 hour or annual valve clearance measurement a part of standard maintenence procedures.
Mike T.
Retrieved from "https://subenews.deej.net/wiki/index.php/EggH6:ValveAdjustmentCheck"

  • This page was last modified on 29 January 2010, at 16:21.
  • Content is available under Public Domain.
 
Gidday Venom

That compression looks to be in metric, so 12.5 to 12.0 variation - i.e. around 4.17%. I think that the measurement may be in Kgs/cm^2, so would be between 171 psi and 178 psi. The measurement also depends on whether the readings were taken "wet" (oil squirted into the cylinder before cranking), or "dry" (no additional oil added). Are these measurements within spec for this motor?

In the photo of the plugs, the closest one looks to have a huge gap compared with the others. How do all the gaps compare with spec?

If I were you, I would be inclined to pull the heads. It might be a bugger of a job to do now, but nowhere near as much as having to do it later (potentially).

Doing this would allow you to inspect the bores for lipping, scoring or out of round (and mike them), valve heads, piston crowns (and whether or not there is any sign of carbon build up around the edges). It would also allow ascertaining that the block and head surfaces are flat, and have them machined if not.

Basically, if you are going to do this - and you are patently past the point of no return - do it once, and fully and completely IMNSHO.

That way, when the engine goes into your car, you will be reasonably assured that there is little likelihood of having to take it out again for a couple of hundred thousand Kms.
 
Looks like the oil changes were few and far between. Pull the sump and see if there is crap in there, especially on the pick up. If the oil changes were few and far between, then it is not looking good for coolant changes either. May also be an issue with cooling, perhaps the thermostat, maybe more. Since you have all the gaskets- hopefully genuine- then pull the heads and check the coolant passages and for any signs of corrosion, and the bores for any signs of scuffing. Replace all water pump and have a good look at the tensioner. You may want to consider using head studs instead of bolts when re-assembling. If you do pull the heads, they will require skimming.
 
^^ That procedure for doing shimmed tappets seems strangely familiar to me ... It is not a simple job!

Make sure that you re-measure them all after you have reassembled the cams to the heads to make certain that you haven't cocked any of them up.

I did when I did my Austin Kimberley shims. Had to do it all again ... :(.

BTW, with the Kimberley, the clearances were also affected by the head tensioning, so follow this to the kerning on the letters too. There is zero room for any kind of error in this procedure IME.

Also BTW, I agree about running the valve clearances very slightly on the loose side, specially the exhaust valves. Better to lose a slight amount of power than it is to have a slight amount of burned out valves ... :iconwink: :poke:.
 
The km are usually always genuine for a jdm engine. No need to lie, the Japanese get rid of a car with 100,000 like we do with one that has 350,000+. That and to be sold secondhand legally in japan the safety standards they need to pass makes a racv/racq/rac check look like a joke to the point of "does it leak oil, yes, ok crush it"

Not to mention in the Tokyo region you need to prove you have somewhere to park the car and pay exorbitant rego costs before your allowed to purchase one.

Thanks for the post Venom, I'll be revisiting this when i work out if I'm keeping blinky and putting another motor in him or changing to a different car altogether.
 
Playing with a motor out of the car is fun :) Only done in car before and it sucks :monkeydance: balls.

That valve procedure is different for a H6. They are shim over bucket lifters and are a different design to the EJ so not sure if that will help you.

Compression variation between cylinders is within spec. I don't speak Japanese so can't ask what kind of compression test they did. Cold with\ motor out of the car that's for sure or he wouldn't be sitting next to it. Wet or dry who knows. If any one cylinder was low then I would be worried.

I'm all for pulling the heads if i have good reason to. What I want to know is why there is some oil in the combustion chamber. As I've found valve clearances are important, as they go out of spec do they let oil in? I get the sense this is happening to my car. Or do I need to pull the heads and replace valve seals? Obviously piston rings can let oil in. Seems if it's been sitting oils is more likely to leak in while engine is sitting from the valves?

I replace the oil in my car currently every 5,000km with full synthetic and still get a similar varnish. Actually worse. A honey/brown varnish shouldn't be too bad? Black sludgy stuff not so much? There's definitely no sludge and it hasn't been cleaned off. if it had been clean off the varnish would be gone in places as its very easy to wipe away.

Ideally would like to know why I'm doing what I'm doing to make sure it's actually addressing any problem (or potential) I have.

Bottom end on these is suppose to be solid and I'm not pulling it apart. If it's ****ed it can die a slow death while I rebuild my second motor.

Suppose I should just pull the heads anyway, I had resigned myself to it and just looking for excuses not too ;). My wallet is giving me sad eyes :cry:
 
^ Blood oath the procedure is different for adjusting the valves!

The N/A EJ engines all have adjusting screws and lock nuts. Piece of the proverbial.

The turbo EJ engines have bucket tappets with shim adjustment (like the H6). Not sure about the DOHC N/A EJ donks ...

Shimmed tappets are great for performance and the lack of a need to adjust them unless you pull the engine or cams apart, but absolute mongrels of things to adjust when you have to.

As I said before, it pays to check and double check all the measurements, and your arithmetic! It is very easy to get it wrong, trust me, I have done this - got it wrong, that is.

Be very careful that the shims do not get away when you remove the cam carriers. You have to be completely certain as to which shim relates to which measurement you have taken, or you're snorked!

Also be careful about the orientation of the cam carriers vis-a-vis the heads. It is easy to reverse them when removing them, at least mentally.

Have fun. I am sure that you will do everything very well.
 
Back
Top