- Joined
- Dec 3, 2012
- Messages
- 766
- Location
- Perth Western Australia
- Car Year
- 1999
- Car Model
- Forester
- Transmission
- 5MT
Low range oil feed.
So a bit of an update on the gearbox.
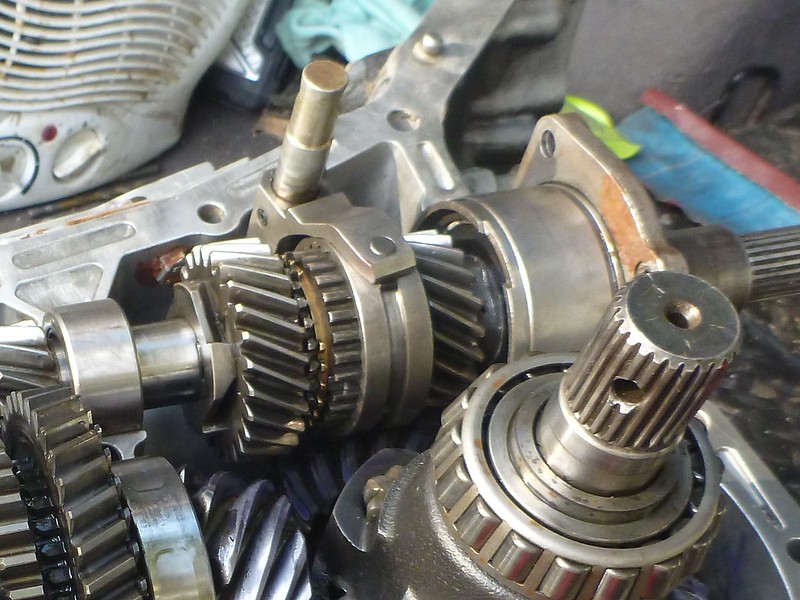
I decided to pull the box last weekend to check out how the internals were going since my low range and 1st gear had started to whine. I was surprised by a number of things when I opened it up.
Firstly as expected the low range whine was caused by slight surface damage on the gear teeth of the input low range gear and the adjacent gear. I did this after multiple attempts at a very steep climb. Being right up the front of the box oil would have been limited and damage would likely occurred from hot heavily loaded gears. There was no evidence of gears looking burnt in colour as I had heard others being worried of which was also interesting.
The 1st gear whine was more interesting. I could not see any evidence of tooth damage at all, no indication of anything that could cause the noise. Investigating further I found the shaft bearing on the upper 5th gear was in bad shape. It was full of what looked like heavily deteriorated oil. There were also periodic wear marks around the bore and shaft. I put this down as the cause of the noise as this bearing is spinning fastest in 1st gear and is stationary in 5th gear.
I had been warned by a Subaru wrecker that 5th gear dries out during hill climbs which I had not taken any notice of as it seemed plain ludicrous that 5th gear at the back of the box would dry out when all the oil had run to the back. Now I am less sceptical.
The 5th gear bearing is fed by oil flicking up in the transfer case, this oil lands in a plastic channel and runs forward being fed in to a hole in the end of the input shaft. If the gearbox is facing up a steep enough uphill the oil will not flow forwards and lubrication may not be sufficient. This is only my theory however I feel it has some validity.
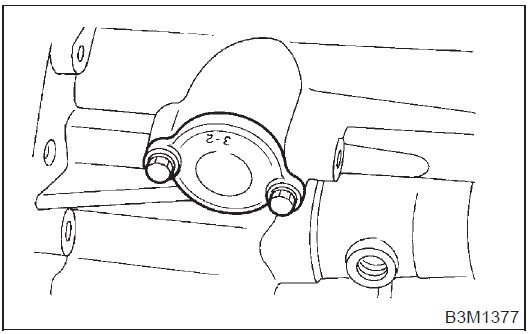
The other factor that could play a part is that I put the pickup for my low range oil feed at the very back of my gearbox. My thinking was that going up hill all the oil would run to the back of the box so it was the ideal pick up location. I did not however look closely at the transfer case housing. As the below image shows there is no way for the oil to enter the transfer case until it reaches the hight of the centre of the lower lay shaft.
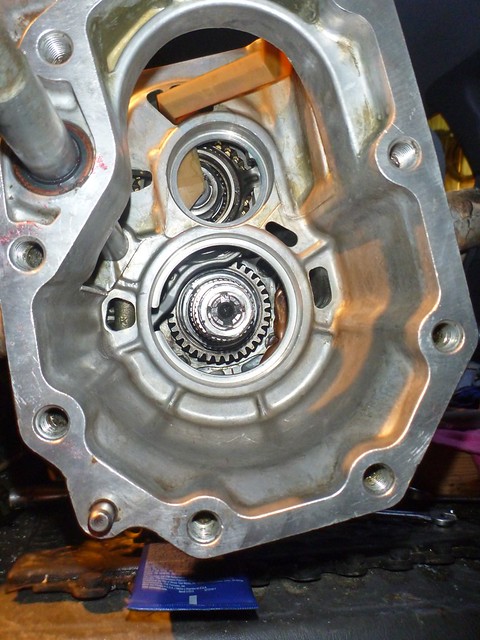
Now if my oil feed is removing all the oil from the transfer case, which is not able to re-enter the transfer case unless on the flat or slightly uphill then there is no oil left to be flicked up into the oil feed for the upper shaft. Again just a theory but I dont have other ideas...
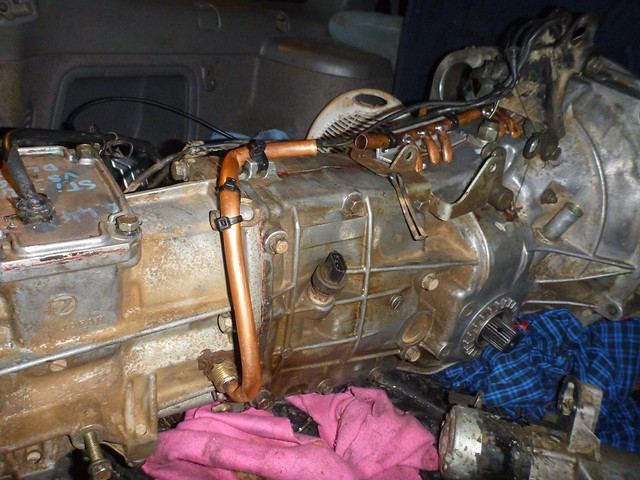
Whilst I had the box out I decided to redesign my complete oil feed for the low range. starting with the pickup.
The new pickup collects oil from the lowest point in front of the transfer case, just below 5th gear.
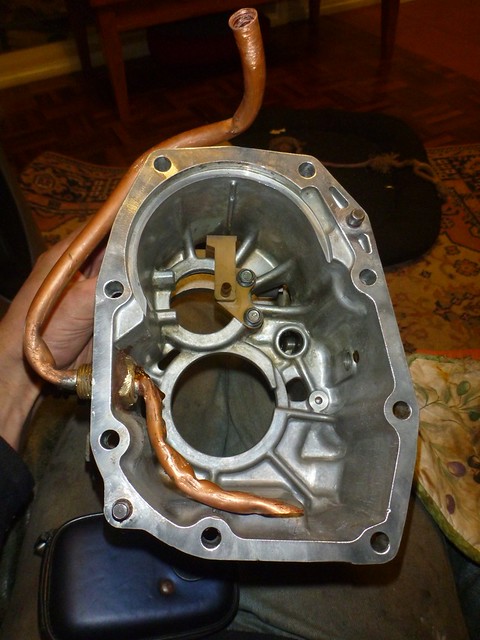

I didnt do a very pretty job with the pipe bending but it works and still has good flow which is the important bit.
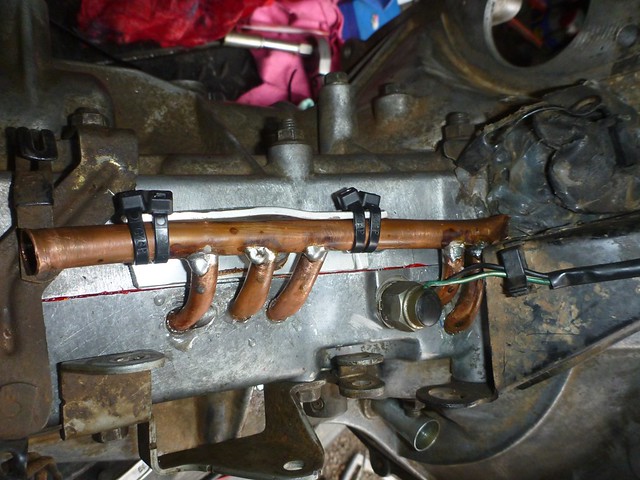
Next was the feed to the low range gears. I previous feed just dumped oil into the top of the case which was pretty pointless as it was very unlikely that any of the oil would hit the gears. I wanted my new design to feed oil into the meshing side of the gears just before they mesh however this was not possible with out I high pressure squirting jet and was just to difficult.
As a compromise I decided to feed oil to all four gears and 1st gear as well to ensure it was also protected. I soldered the 5 feeds into one pipe
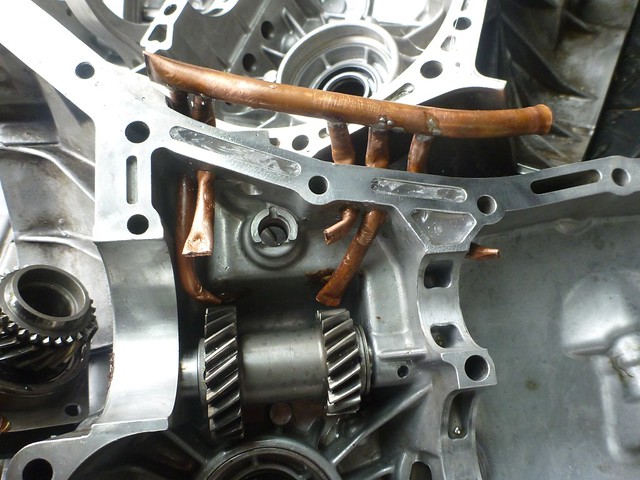

Again not pretty but functional.
The next part was the tricky yet I feel most important bit. I hooked up my oil feeds to my gearbox oil pump, pump input into a bucket of oil, had the battery at operating voltage and switched the pump on. This was to check the pump matched the feeds, that the flow was even through all feeds at all slopes and that the oil was hitting the gears and coating them well at all gearbox slopes. I slowly closed the tubes at the ends of the feeds to control how much flow goes where. This was a very messy tedious process however I was very happy with the finished product.
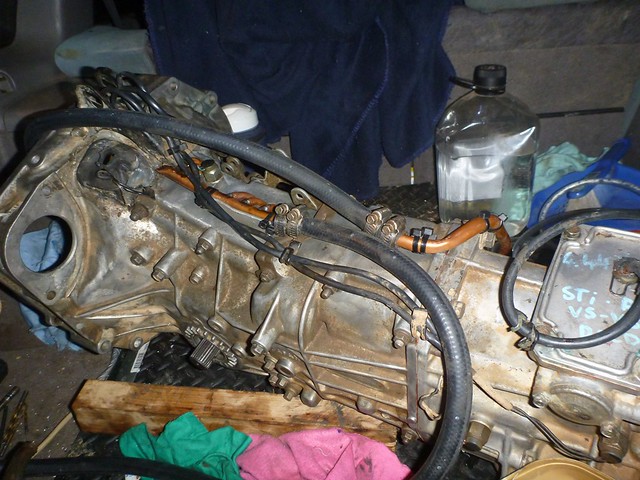
Finally it was tidying it up all after the box was assembled.
Unfortunately I didnt have replacement low range gears so all this work will have to be redone at some point in time however I will hopefully have an SG box as a platform by then. Good think I thoroughly enjoy playing Subaru gearbox Lego.
I also took a few other pics of the gearbox so I figured I would put them in as well.
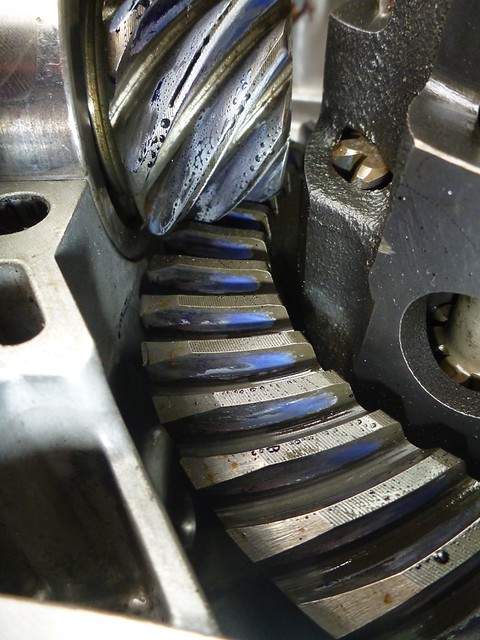
Checking front diff contact pattern, also shows the amount I removed from the 4.44 gear to get it to fit with the 1.59 low
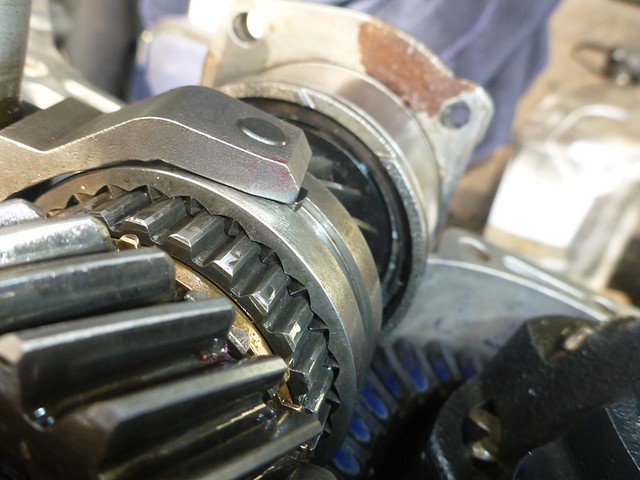
Clearance between the trimmed low range synchro sleeve and the trimmed 4.44 gear

The trimmed l series synchro sleeve in the sf selector fork (tiny amount of material removed to fit synchro sleeve) and trimmed l series selector fork feet.
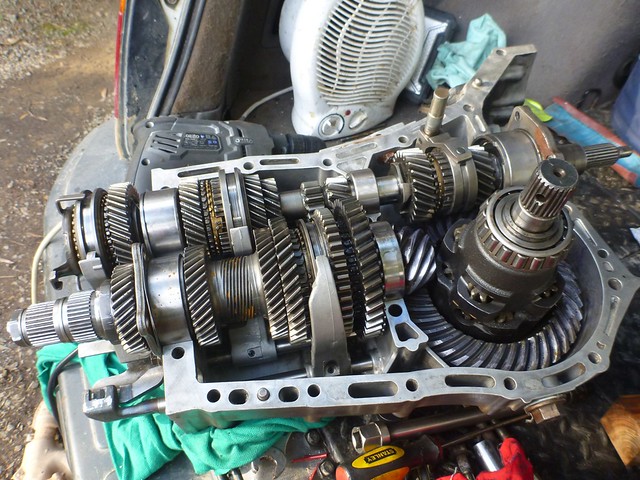
And finally one of everything in the case.
Hopefully this info will prove helpful for people trying to fit low series low and 4.44 final drive.
So a bit of an update on the gearbox.
I decided to pull the box last weekend to check out how the internals were going since my low range and 1st gear had started to whine. I was surprised by a number of things when I opened it up.
Firstly as expected the low range whine was caused by slight surface damage on the gear teeth of the input low range gear and the adjacent gear. I did this after multiple attempts at a very steep climb. Being right up the front of the box oil would have been limited and damage would likely occurred from hot heavily loaded gears. There was no evidence of gears looking burnt in colour as I had heard others being worried of which was also interesting.
The 1st gear whine was more interesting. I could not see any evidence of tooth damage at all, no indication of anything that could cause the noise. Investigating further I found the shaft bearing on the upper 5th gear was in bad shape. It was full of what looked like heavily deteriorated oil. There were also periodic wear marks around the bore and shaft. I put this down as the cause of the noise as this bearing is spinning fastest in 1st gear and is stationary in 5th gear.
I had been warned by a Subaru wrecker that 5th gear dries out during hill climbs which I had not taken any notice of as it seemed plain ludicrous that 5th gear at the back of the box would dry out when all the oil had run to the back. Now I am less sceptical.
The 5th gear bearing is fed by oil flicking up in the transfer case, this oil lands in a plastic channel and runs forward being fed in to a hole in the end of the input shaft. If the gearbox is facing up a steep enough uphill the oil will not flow forwards and lubrication may not be sufficient. This is only my theory however I feel it has some validity.
The other factor that could play a part is that I put the pickup for my low range oil feed at the very back of my gearbox. My thinking was that going up hill all the oil would run to the back of the box so it was the ideal pick up location. I did not however look closely at the transfer case housing. As the below image shows there is no way for the oil to enter the transfer case until it reaches the hight of the centre of the lower lay shaft.
Now if my oil feed is removing all the oil from the transfer case, which is not able to re-enter the transfer case unless on the flat or slightly uphill then there is no oil left to be flicked up into the oil feed for the upper shaft. Again just a theory but I dont have other ideas...
Whilst I had the box out I decided to redesign my complete oil feed for the low range. starting with the pickup.
The new pickup collects oil from the lowest point in front of the transfer case, just below 5th gear.
I didnt do a very pretty job with the pipe bending but it works and still has good flow which is the important bit.
Next was the feed to the low range gears. I previous feed just dumped oil into the top of the case which was pretty pointless as it was very unlikely that any of the oil would hit the gears. I wanted my new design to feed oil into the meshing side of the gears just before they mesh however this was not possible with out I high pressure squirting jet and was just to difficult.
As a compromise I decided to feed oil to all four gears and 1st gear as well to ensure it was also protected. I soldered the 5 feeds into one pipe
Again not pretty but functional.
The next part was the tricky yet I feel most important bit. I hooked up my oil feeds to my gearbox oil pump, pump input into a bucket of oil, had the battery at operating voltage and switched the pump on. This was to check the pump matched the feeds, that the flow was even through all feeds at all slopes and that the oil was hitting the gears and coating them well at all gearbox slopes. I slowly closed the tubes at the ends of the feeds to control how much flow goes where. This was a very messy tedious process however I was very happy with the finished product.
Finally it was tidying it up all after the box was assembled.
Unfortunately I didnt have replacement low range gears so all this work will have to be redone at some point in time however I will hopefully have an SG box as a platform by then. Good think I thoroughly enjoy playing Subaru gearbox Lego.
I also took a few other pics of the gearbox so I figured I would put them in as well.
Checking front diff contact pattern, also shows the amount I removed from the 4.44 gear to get it to fit with the 1.59 low
Clearance between the trimmed low range synchro sleeve and the trimmed 4.44 gear
The trimmed l series synchro sleeve in the sf selector fork (tiny amount of material removed to fit synchro sleeve) and trimmed l series selector fork feet.
And finally one of everything in the case.
Hopefully this info will prove helpful for people trying to fit low series low and 4.44 final drive.
")