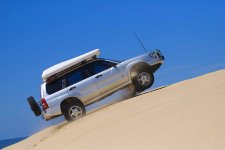
Kevin's MY'03 Foz

Take_Off.jpg

I've been recently asked again what mods have I made, so here they are as copied from SF.ORG and needs updating (in process):

Mods to my Foz

In case of interest these are the mods I’ve made to my MY03 XS to prepare it for outback travel and club events plus other “enhancements”. (I’ve installed everything myself except the tyres, new struts & rear springs and muffler):

SubaXtreme bull-bar, rear bar with carriers, sump guard and 40mm lift kit. Better approach / departure angle, ground clearance and belly protection.

Added snorkel – having experienced the nasty effects of taking in water, i.e. hydro-locking resulting in a blown motor, this was a necessity before attempting the Cape York trip in 2005. I decided to not go through the fender and instead fitted a Mazda Bravo snorkel on top of the LHS fender with the inlet through the plastic cover of the air dam in front of the windscreen. In really dusty conditions I use a finer-filter “Droopy” in the snorkel head. (Droopy is an oiled foam cone-shaped filter)

Extended front air breathers and added filters to keep out water and dust (transmission case, oil pump housing). Added rear diff breather.

Tranny cooler.

Added dual battery system (for fridge/freezer) also in preparation for Cape York in 2005. I was very happy with the 60 litre Evakool ice box for short trips of 2-4 days but a fridge was very necessary for the long trips where I use the Evakool 49 litre as a freezer and use the ice box for daily storage and cycle ice bottles though the freezer. (2014 - I now also have a 110L Evakool fridge/freezer for the Triton)

Removed the OEM struts (incl self-levelling rear) and replaced with KYB Excel-G and raised King springs. This was after a self-levelling strut failed on the Cape York trip.

Had rear trailing arm blocks made: https://offroadsubarus.com/showthread.php?t=1162

Subsequently had custom struts made: https://offroadsubarus.com/showthread.php?t=953

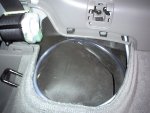
Replaced tyres with Yokohama Geolander All Terrain +II 21565R16. Then after losing 6 of 11 Yokos to side-wall damage changed to 15” x 6” Speedy Sorroco II wheels with +50mm offset and 21575R15 B F Goodrich AT Traction t/a’s. The wheel change required grinding down the front brake callipers for clearance. The spare wheel does not now sit properly in the wheel well; even when deflated.

Replaced exhaust from the last flange back (axle-back) to include a new, lower profile Lukey muffler to aid departure angle and tuck the muffler up behind the SubaXtreme bar. In 2014 replaced from headers back with new free-flow system.

Off-Road Systems designed and installed a set of rear drawers. I added 2 x 4WD Warehouse fridge slides “Ezi-Slide” later.
https://offroadsubarus.com/showthread.php?t=574

Added circuit to isolate radiator fans for water crossings.

Centre diff lock circuit. Fools the TCM into a 50/50 distribution of power front / rear

Substituted fog lights with Hella Comet FF 50 (because of their low profile). Added Narva Ultima Combination Driving Lamp Kit 175mm dia. One Broad Beam, One Pencil Beam.

Sealed up the fog lights with silicone and added breather tubes extending into the engine bay (because the fogs took on water at every river / creek crossing)

UHF CB and antenna. A GME remote head unit which I installed in the ash-tray. (So unplug the mic, close the lid and it’s not visible.) The base unit sits vertically behind the centre console. Antenna is 2 part and gives 6 DB std; 9 DB extended. Replaced antenna with GME GME AE4018K1: https://offroadsubarus.com/showthread.php?t=761


Cell phone (GSM) in-car kit and high gain antenna. (2014 - still there but no longer used; I need to pull it out)

Covered headlights, driving lights and fog lights with 3M protective skin.

Installed a marine type compass that has back lighting. (Has compensating adjustments for electrical interference)

Set-up for Thule roof rack and roof box. (Transferred from MY‘97 Outback)

In 2007 got a Columbus roof-top camper to which I added solar panels in 2014: https://offroadsubarus.com/showthread.php?t=5714

Electronic Rust Prevention System (Capacitive Coupler type).

Jaycar Super Tweeters.

Sealed up rear flow-through air vents located on each side of the car in behind the bumper bar to prevent the ingress of water and dust.

Added flexible mud flaps

Added trailer electrical plug.

Removable radiator mesh to stop bugs

Dust filter in cabin. This is a standard Subie part and is located behind the glove-box but is not supplied as standard


Added rear view camera so I could see when both fridge and ice boxes are carried in the back.
 
Last edited:
^ Nice balance of mods, Kevin.

How do you fit a 60L Esky and a 49L fridge/freezer in the car at the same time?

I'm having enough trouble fitting the 60L 3-way into mine. I wish that someone made something a) smaller capacity (I'm not a family of six ... ); and b) lower.

My 60L is 445 mm high (inside is about 335 mm), and the height makes it more than awkward. Rear seat is about the only place I can put it.
I have thought about sitting it on the cargo area floor, but then the cargo shelf gets complicated because of the height.

Since a 1.25L drink bottle is only 300 mm high, 2 Coke cans are 260 mm and a 2L milk container is about 285 mm, it is hard to comprehend this internal measurement. If it were 30 mm less height internally and externally, it would fit much more easily!

Anyway, I look forward to more details about your mods, specially the way you have done the snorkel.
 
Hi RB,
Have you tried removing rear seat and making a simple wooden frame for fridge to sit in as I have. I tie fridge down with some solid elastic straps from SCA.
Most of my "stuff" sits in rear seat area with second battery on floor behind driver, some spare CV boots, Dolphin torch and the like in plastic box on floor behind passenger seat with first aid kit in other box on top of this box. Camping gear, tent, fly, pegs, ropes, spare tarps etc in large plastic box along side fridge. Another box with sleeping gear, air bed, pump bags, etc on top of this one. Two, if needed smaller cooking gear boxes on top of these all held down by strong straps. Works well and much more head space above fridge, Waeco 45 l.
This leaves rear cargo space for such as water, shovel and other assorted junk and moves a lot of weight forward.
Downside is car becomes a two seater only which is fine for us.
 
^ Nice balance of mods, Kevin.

How do you fit a 60L Esky and a 49L fridge/freezer in the car at the same time?

Ta and the answer is "Off-Road Systems designed and installed a set of rear drawers. I added 2 x 4WD Warehouse fridge slides “Ezi-Slide” later"

Both Evakool boxes are the same size (11L of space in the fridge is consumed by the mechanicals); sit one on each fridge slide on top of the drawers.

The Ezi-Slides rattle a little bit but give a nice flat surface when not in use. You can see the 2 boxes in this pic (Fraser)


Snorkel Install

Snorkel Install
Copied from SF.ORG

The decision on which side to mount the snorkel in this manner will depend on the location of your windscreen wiper motor. Mine is on the RHS so the snorkel is mounted on the LHS to get a clear pipe run though the air dam in front of the windscreen. I decided to use the 2nd hand snorkel rather than a piece of pipe up the A pillar so as to maintain the air reserve dam in the snorkel itself (and thinking that it would also retain any moisture until it had evaporated).

Pic 1 - Removed the plastic cowling in front of the windscreen to expose the air dam.
Pic 2 – The 2nd hand snorkel off a Mazda Bravo. I cut & blocked off the snorkel piece that goes through the fender and made a new entry point in the back to suit (do this AFTER the pipes and bends are in position!). I made up a rubber flange from a gutter stop plug (90mm I think) and attached with silicone and self tapping screws to the new snorkel entry hole.
Pic 3 – Cut a hole through the firewall and finished off with rubber trim. I had to relocate the security alarm first.
Pic 4 – Mounted a bracket on the A pillar using 2 self-drilling screws. (I used “make-a-bracket”)
Pic 5 – A bracket for the fender on to an existing bolt plus a self-drilling screw horizontally into the fender edge for stability
Pic 6 – The inlet rubber bend to which another 60 degree metal bend is attached. (this will depend on the snorkel you use – you could simply add a bend and run a pipe up the A pillar) I had to cut away a little of the sheet metal above the a/c air intake. I also had to cut a hole in the plastic cowling; finished off with rubber trim. Be careful with positioning so as not to interfere with the windscreen wipers.
Pic 7 – The plumbing in the engine bay
Pic 8 – The plumbing inside the air dam.
Pic 9 – Finished

To stablise the pipe that runs across the motor and to protect the distributor, I slipped a piece of radiator hose over the pipe.


@ Kevin

Ha! I suspect that you are a lot younger and fitter than I am. Most days, I couldn't even climb up to that tent with a ladder!

It does seem that I can put up my trailer tent more easily than I can my Crusader tent. Sure makes getting in and out of bed easier. Necessary when one has a frequent need to at night ... :iconwink: ...

@ Ate

Yeah, I have thought about that. When I eventually get the cargo shelf fitted, the rear seat squab could live on top of it between extended stops, then swap out the shelf for the squab as and when needed.
 
Hi RB, Have you tried removing rear seat and making a simple wooden frame for fridge to sit in as I have.
^^^^^^^^This.
See my OzFoz post. I know you said you need extra bum-spaces, but this really does make fridge-mounting so much easier - and liberates much-needed space in the rear cargo compartment.
Most of my "stuff" sits in rear seat area with second battery on floor behind driver
In my case, the aux battery (slimline type :ebiggrin::ebiggrin:) went under the front passenger seat. Secure, in an otherwise wasted space, and out of the way.
 
^ Very good write-ups, Zippo. Thanks.

Methinks that the platform/seat squab changeover system will have to wait until after my Brissy trip. I will be lucky to get my cargo barrier installed before I go. Not so much the work involved as the fact that the worker is very often not fit for duty for any one of a number of health reasons! :( :( :sadbanana:
 
Hi Kevin, What do you reckon your all up weight would be when laden for an expedition?
Think also you had your arches welded for strength.

Don't know - probably over GVM :lol:

Yes, rear arch seams are welded.
 
Snorkel build pics added to earlier post
 
Snorkel Install
I feel compelled to describe that plumbing layout as (ouch!) a tad long-winded. Would be a lot shorter on a LHD, but you'd still need allowance for movement.

Also what is holding the snorkel to/above the LHS guard (last pic)?
 
Gives any moisture plenty of time to evaporate :iconwink:

"Pic 5 – A bracket for the fender on to an existing bolt plus a self-drilling screw horizontally into the fender edge for stability"
You can see the bracket in pic 3 & 4 as well.
 
Wow Kevin,
Your LHS snorkel idea has me thinking now lol

I definitely like the idea of giving any moisture plenty of time to evaporate

Really love what you've done with your Foz

1WD
 
Thanks - always a work-in-progress it seems!
 
REAR DIFF BREATHER
(A repost from 2003! As it was early days for fitting breathers the only way to explore was to drill a hole in the spare wheel well)

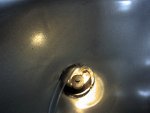
Completed the install of the diff breather extension by removing the OEM breather then using a rubber connector (approx 90mm X 12mm), usually used for the lead of an electric iron, and some 8mm plastic tube. Cut the small end of the connector so that when inserted into the breather hole, it won't bottom out; then insert it into the breather hole (a bit fiddly - but persevere).

Connector installed
Plug Inserted.JPG

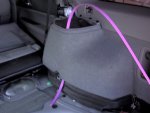
Remove the RHS strut cap and feed the tube down behind the trim and through the existing hole in the floor (cut a hole in the rubber plug). (I found it difficult to simply push the tube behind the trim by itself, so I fed a plastic snake through first then pushed the tube down beside the snake.)
Snake.JPG

Through the existing plug

Cabin Entry.JPG
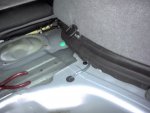
Under the floor, the tube runs above the fuel tank filler, then on top of the rear sub-frame, through the cut hole in the rear sub frame & down to the breather.
Leave the tube long so that it can be pulled through the holes previously cut in the wheel well and rear sub-frame. Lightly coat the tube end with liquid soap and insert into the end of the connector ensuring that it doesn't bottom out (I used some masking tape wrapped around the tube to indicate the limit of travel into the connector). Test for a complete seal by blowing/sucking into the open end of the tube.

Tube inserted into connector (still has masking tape on it)
Tube Inserted.JPG
Pull any excess tube back through the floor and up beside the strut tower. Cut the tube so there is sufficient to run the open end up behind the rear quarter panel trim a little (I did this simply in case there is any oil odour).


Strut end.JPG
Because everything is a push fit, I have not sealed the tube or the connector with silicone or similar with the thought that should I need to replace the diff oil, I can simply remove the breather, insert a funnel and pour the oil in, rather than have to hand pump it in from under the car.

THE HOLE (for SG series).

AUT_3327.jpg
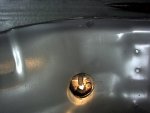
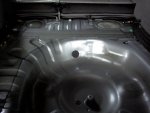
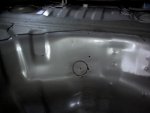
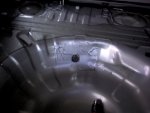
The hole in the wheel well is approx 40mm. (Tip - get an appropriately sized rubber bung first and match its sizing) Suggest a 35mm hole in the sub-frame. Tape up the wheel well wall to protect the surrounding area before drilling. The centre of the hole is 18mm off-centre towards the RHS and approx 95mm from the bottom of a straight-edge placed across the top front of the wheel well. Drill holes at 90 degrees to the face of the wheel well (i.e. the drill bit angled down). Drill a pilot hole through both the wheel well and rear sub-frame then review the positioning from under the vehicle. The position of the completed hole needs to be under the corner fold of the sub-frame, so as not to weaken it, and sufficiently above the sub-frame holes that support the diff in order not to weaken that area either. Be careful not to let the drill bit travel too far after drilling the hole or you might drill a hole through the breather, or worse still, put a hole in the diff!

Hole Position.JPG

Drilled (I didn't have good hole saws back then so I had to drill several holes around the circumference and then file it)

Taped Drilled.JPG

Once complete insert a rubber bung to seal the hole.

Since back then I of course heard that you may achieve removal of the old breather and insertion of the new setup without having to cut the holes as above. Now that I know how it's done and how everything fits, it may just be possible to do it without the holes - which would be preferable.
 
Last edited:
Back
Top